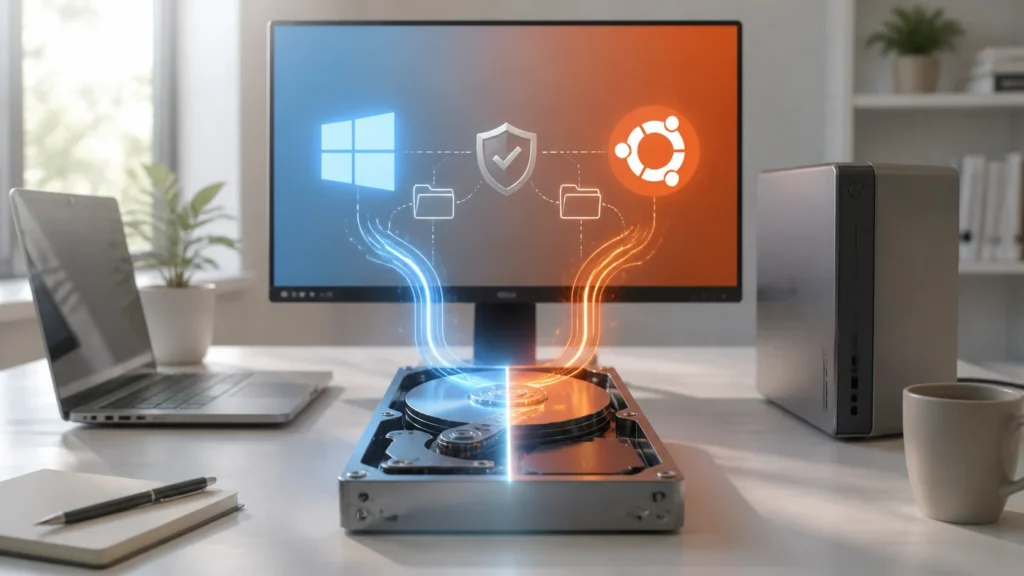
Dual-booting Windows 11 and Ubuntu is one of the most sensible beginner ideas in Linux.
You keep Windows.
You gain Linux.
You do not have to choose your entire computing future in one afternoon.
And yet it can also feel like one of the most stressful beginner projects.
That is not because dual-booting is inherently reckless.
It is because it touches the part of the machine people fear most:
the drive, the boot process, and the possibility of making a familiar computer feel uncertain.
What helped me think about dual-booting more clearly was this:
safe dual-booting is mostly about what you do before the installer starts changing anything.
- Why dual-booting still makes sense
- The preflight checks that make it safe
- How to prepare Windows 11 correctly
- How to install Ubuntu alongside Windows
- When not to proceed yet
The steps and terminology below are checked against Ubuntu's official documentation; menu names and behavior can vary by operating-system release and hardware.
Dual-booting is attractive because it keeps your options open
For a beginner, that matters a lot.
You do not have to erase a familiar environment just to learn a new one.
You can keep the Windows apps, files, and habits you still rely on while giving Ubuntu its own place to grow.
That makes dual-booting a very human compromise.
It says:
- I want to learn Linux;
- I do not want to pretend I no longer need Windows;
- I would rather compare the two on the same hardware than imagine the difference abstractly.
That is one reason it sits so naturally after trying a live USB session and after choosing a first distribution more deliberately in trying Linux without installing it.
Live USB first.
Then trust.
Then installation.
That order is calmer.
The safe version of dual-booting starts with a backup, not with partitioning
Ubuntu’s own installation tutorial says it is always recommended to back up your data before installation. I think that sentence matters even more in dual-boot scenarios than in single-OS installs.
Because even when the installer is well behaved, dual-booting is still storage work.
So before thinking about free space, installers, or boot menus, I would make sure:
- important files are backed up somewhere else;
- you know whether your Windows drive is encrypted;
- you know where the recovery key is if encryption is enabled;
- you are not rushing.
This is not paranoia.
It is respect for the part of the machine you are about to rearrange.
Windows 11 encryption is the first thing that deserves your attention
This is where many dual-boot guides become too casual.
Ubuntu’s official installation tutorial includes a special section for installing alongside Windows with BitLocker. It explains that when BitLocker is active, the Ubuntu installer cannot safely interpret the drive layout because the encrypted contents are not visible in a usable way. Ubuntu explicitly warns that the additional installation cannot be performed safely in that condition.
That is a big deal.
And on Windows 11, the situation is not limited to the editions where full BitLocker is obvious in Control Panel. Microsoft’s Device Encryption documentation says that some Windows devices can enable encryption automatically and attach the recovery key to a Microsoft or work or school account. That means a beginner may have encryption in play even if they never consciously “set up BitLocker” as a project.
So before dual-booting, I would verify:
- whether BitLocker is active;
- whether Device Encryption is active;
- and whether the recovery key is backed up and accessible.
Microsoft’s recovery-key guide is very clear about why this matters: Microsoft cannot recreate a lost recovery key for you. If the device ever asks for it after a hardware or boot-related change, you want that key available before you need it, not after.
Back up the recovery key before you touch partitions
This deserves its own section because it is such an easy thing to postpone.
Microsoft says you can back up the BitLocker recovery key by opening Manage BitLocker from Start and selecting the backup option next to the drive. Microsoft also notes that, in many cases, the recovery key is automatically attached to your Microsoft account or your work or school account when encryption is first activated, but it is still important to verify that this backup exists and is accessible.
I think that is the right mindset:
do not assume;
confirm.
If the machine later asks for a recovery key after boot changes, you want that moment to feel inconvenient, not catastrophic.
Use Windows tools to make the free space, not Linux guesswork
This is another place where I think the calmer path is also the smarter path.
Microsoft’s Disk Management documentation says Windows can shrink existing volumes and create new partitions or unallocated space. It also makes clear that if there is no unallocated disk space, you create some by shrinking an existing partition.
For dual-booting, this is the right idea:
use Windows to make the space that Ubuntu will later consume.
That usually means:
- open Disk Management;
- identify the main Windows volume;
- shrink it to create unallocated space;
- leave that space unformatted for Ubuntu to use.
I prefer this route because Windows already understands its own disk layout, and shrinking from inside Windows avoids some of the ambiguity that makes first-time dual-booting feel riskier than it needs to.
Boot the Ubuntu USB in the correct mode and only continue when the layout looks clear
Ubuntu’s installation tutorial explains the normal USB boot flow clearly: create the bootable USB, boot the computer from it, and then choose to try or install Ubuntu.
This is the point where I think beginners should slow down again.
If you boot the installer and the disk layout looks confusing, incomplete, or inconsistent with what you know is on the machine, that is not the moment to improvise.
Ubuntu’s tutorial says that when another operating system is detected, you can get an option to install Ubuntu alongside that OS instead of replacing it. It also notes that the guided interface is designed to avoid overwriting existing files by using the available space.
That is exactly the kind of option you want to see.
If Ubuntu can clearly see Windows and offers the “alongside” path in a way that matches the free space you prepared, the process starts looking sane.
If it cannot, stop and understand why first.
The installer is safest when it is not being asked to interpret encrypted ambiguity
This is really the central idea of the whole article.
Ubuntu’s BitLocker guidance is helpful because it frames the problem correctly. The issue is not that Ubuntu is being difficult. The issue is that the installer needs a readable disk structure in order to make safe decisions.
So the best dual-boot environment is one where:
- the Windows drive layout is readable;
- the free space is already there;
- the recovery key has been backed up;
- the installer sees Windows clearly;
- and the “alongside” flow behaves like it recognizes reality.
When those conditions exist, dual-booting starts to feel much less like a gamble.
When I would stop and not continue yet
I would pause the process if:
- I am not certain the backup exists;
- I have not verified the BitLocker or Device Encryption state;
- I cannot access the recovery key;
- Disk Management is not showing the layout I expected;
- Ubuntu is not detecting Windows cleanly;
- the installer’s storage screen looks more surprising than reassuring.
That is not hesitation for its own sake.
That is good judgment.
Dual-booting is a perfectly reasonable beginner project, but only when the machine is telling a coherent story.
Why dual-booting is best treated as coexistence, not conquest
I think this mental model helps.
You are not “replacing Windows with Ubuntu in pieces.”
You are creating a machine where both systems can coexist cleanly.
That means each one needs:
- enough space;
- a boot path that still makes sense;
- a layout that was prepared intentionally;
- and a user who is not rushing through uncertainty.
The gentler you treat the process, the better the result usually is.
If the setup required panic, guesswork, or improvisation at the storage screen, it was not calm enough yet. A good dual-boot install usually feels almost uneventful because the risky questions were answered earlier.
Conclusion
Safely dual-booting Windows 11 and Ubuntu is less about daring and more about preparation. The important work happens before the installer makes changes: back up important files, verify whether BitLocker or Device Encryption is active, back up the recovery key, create free space from Windows using Disk Management, and only proceed when Ubuntu can clearly see Windows and offer a sensible alongside installation path.
What makes dual-booting feel dangerous is ambiguity. What makes it feel safe is clarity. If the machine’s storage, encryption state, and recovery path are all understood before you begin, dual-booting becomes what it should have been all along: a careful, practical way to learn Linux without giving up Windows on day one.
FAQ
Is dual-booting Windows 11 and Ubuntu safe for beginners?
It can be, as long as the beginner treats preparation seriously: backup first, verify encryption status, save the recovery key, shrink the Windows partition from Windows, and only continue when the Ubuntu installer detects the layout clearly.
Do I need to disable BitLocker before installing Ubuntu alongside Windows?
Ubuntu’s official documentation warns that when BitLocker is active, the installer cannot safely map the drive contents for an alongside installation. That means you should not proceed casually while encryption is blocking clear disk interpretation.
For additional context, see Trying Linux Without Installing: A Guide to Live USBs and How I Run Alpine-Based LXC Containers for Ultra-Lightweight Homelab Services.